1 How to Rebuild the Windows 10 Search Index with Search Indexing Options2 How to Rebuild the Windows 10 Search Index with Command Prompt3 How to Reset and Rebuild the Windows 10 Search Index using Regedit4 How to Fix Windows 10 Search or Repair Windows 10 with DISM and Advanced Startup Options
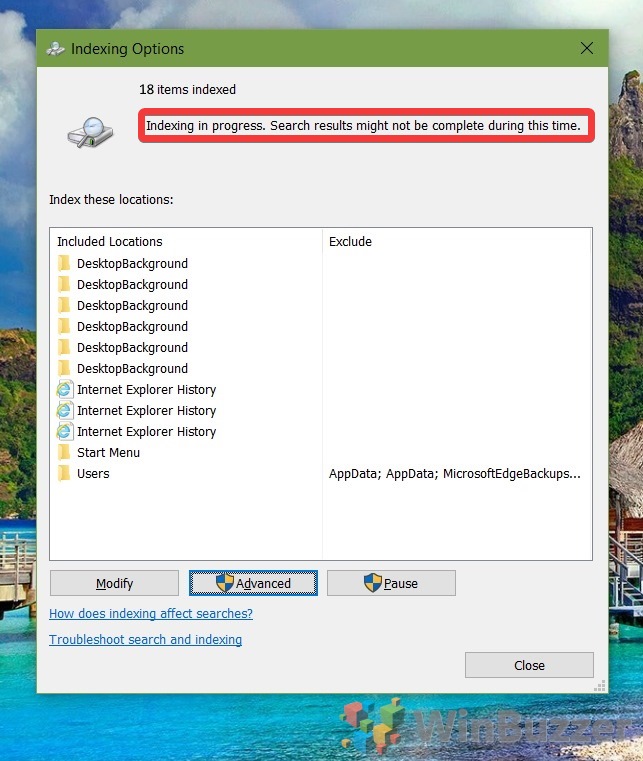
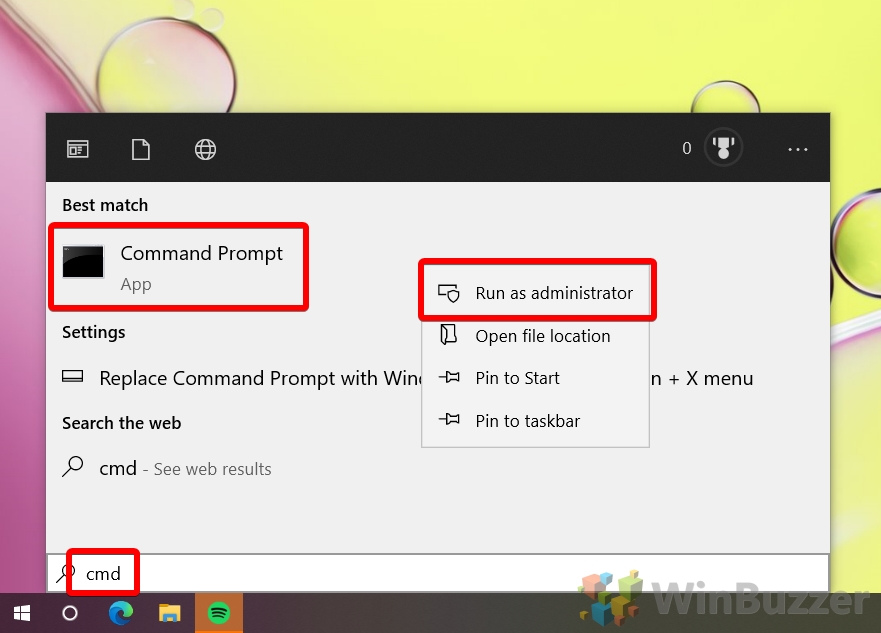
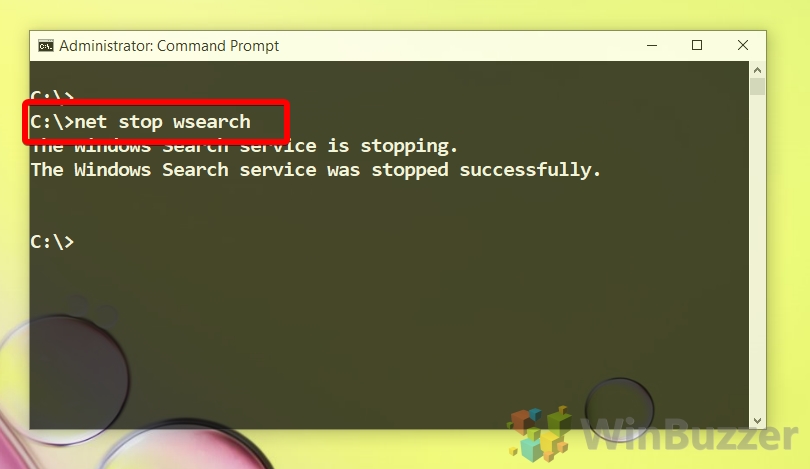
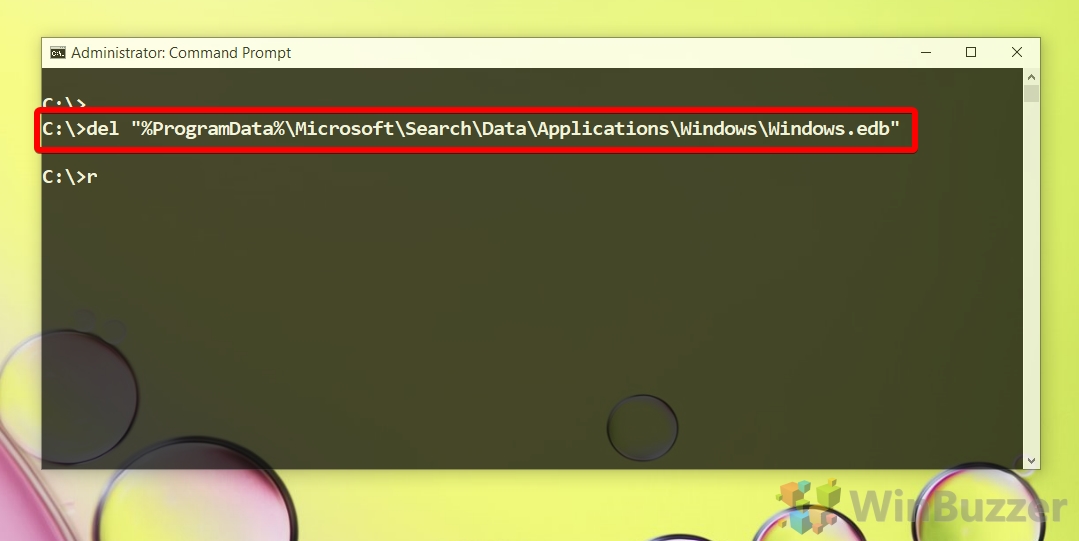
This speeds up Windows 10 search dramatically as your PC does not have to scan your whole system or parts on request. The downside of this Windows 10 index is that its results might be outdated, either showing files that have been removed already or not listing existing files you might be searching for. Mostly you might simply have to wait until those changes get reflected in the Windows 10 search index. In rare occasions, you might need to rebuild the Windows search index manually, to fix bugs or a corrupted search database. Solution: Delete the Windows search index or reset Windows 10 search When you reset and rebuild the Windows search index, you delete all of its contents and tell Windows 10 to start indexing again. There are different ways to do this. You can use the Windows 10 “Search and indexing” troubleshooter as shown in our other tutorial to fix Windows 10 search. Here we show you how to delete and rebuild the Windows 10 search index either via indexing options or just a few CMD commands. At the end we also show you how to completely reset Windows 10 search using a registry hack. Apart from triggering a rebuild of the search index this will also reset search indexing options to factory defaults.
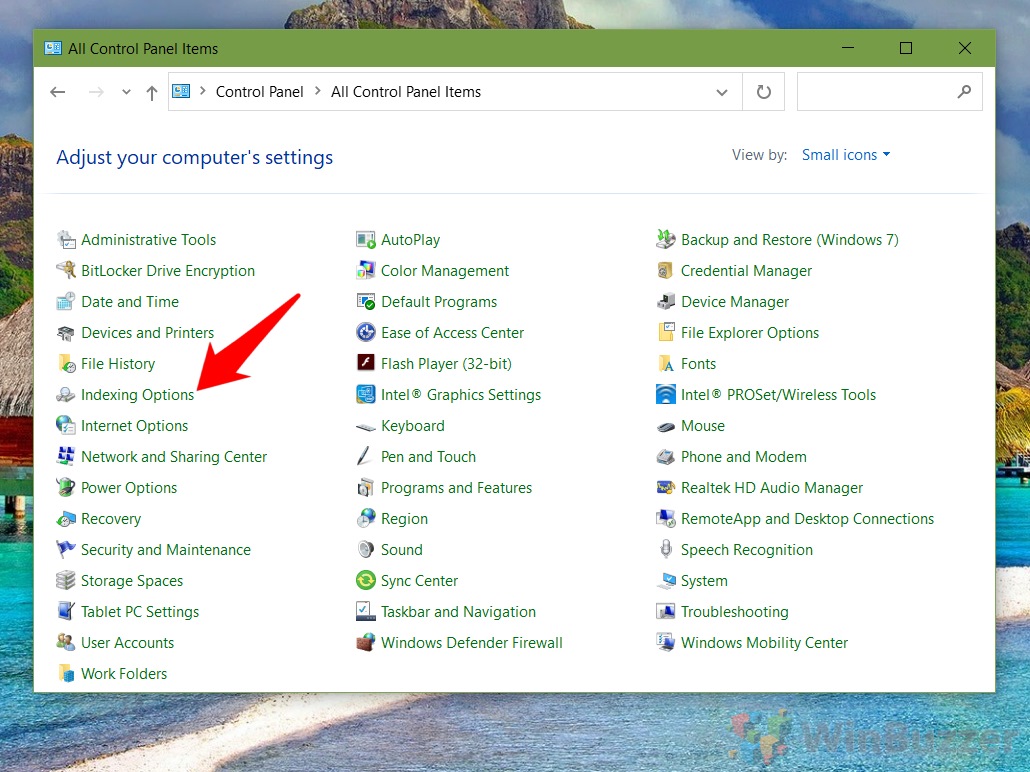
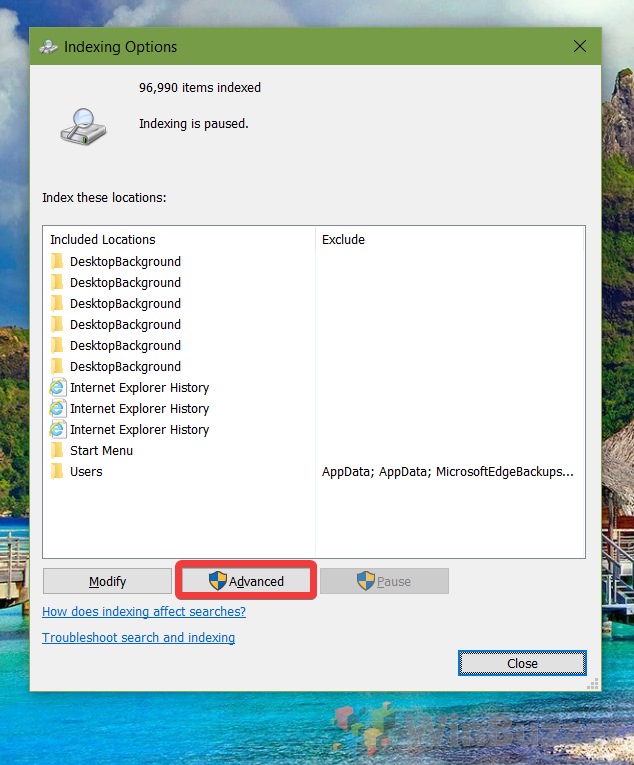
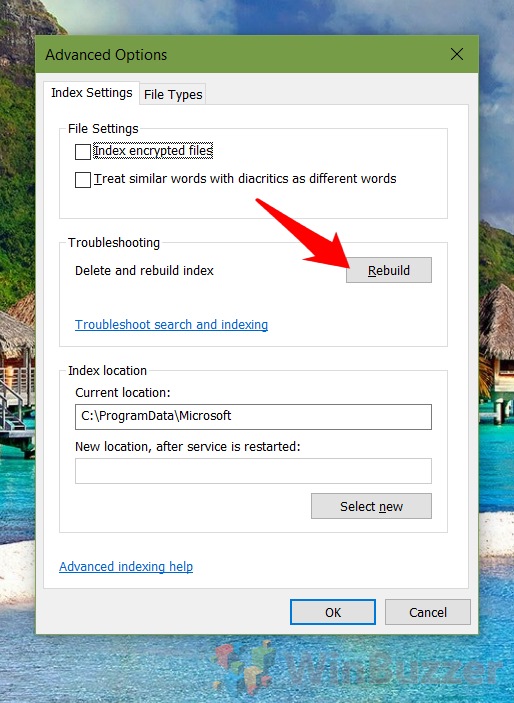
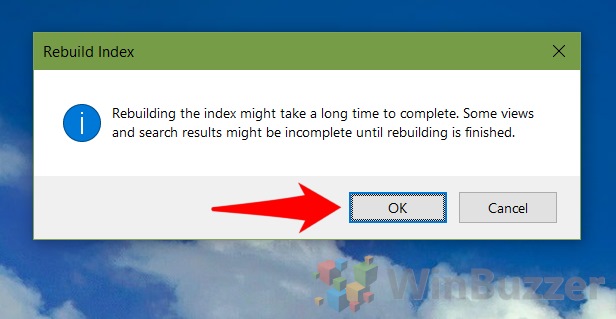
How to Rebuild the Windows 10 Search Index with Search Indexing Options
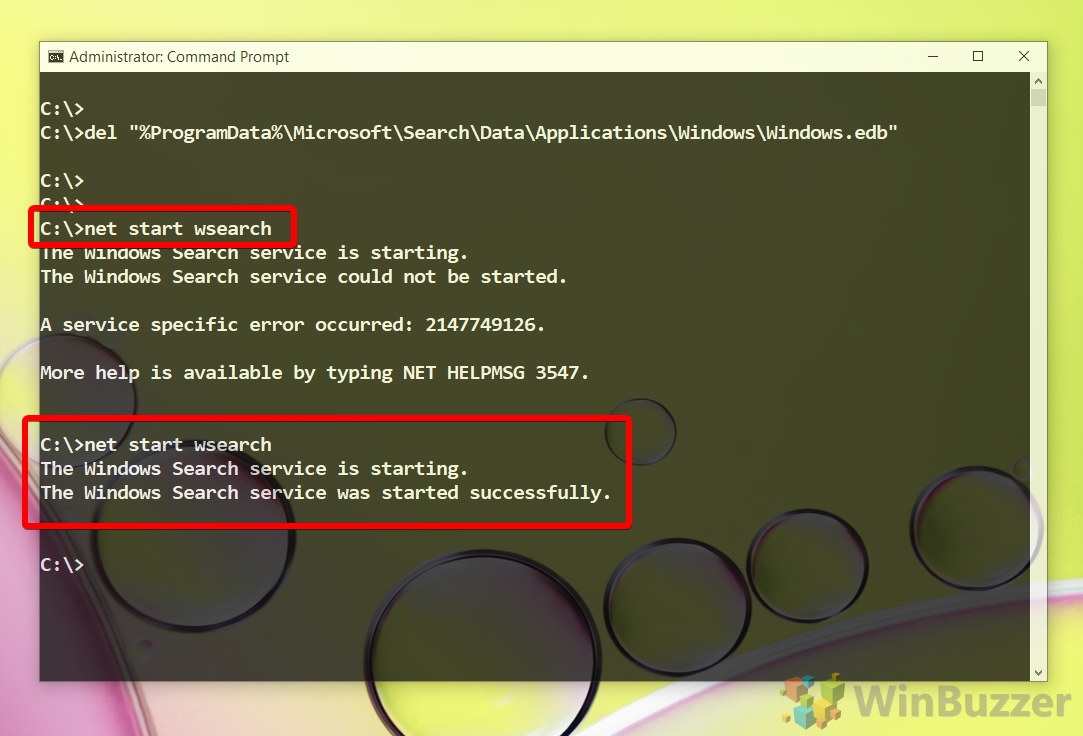
How to Rebuild the Windows 10 Search Index with Command Prompt
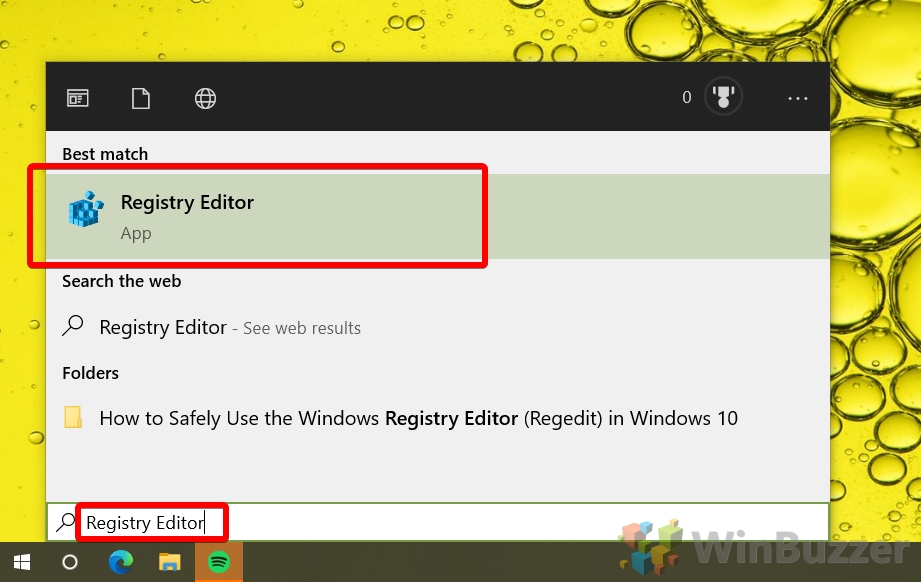
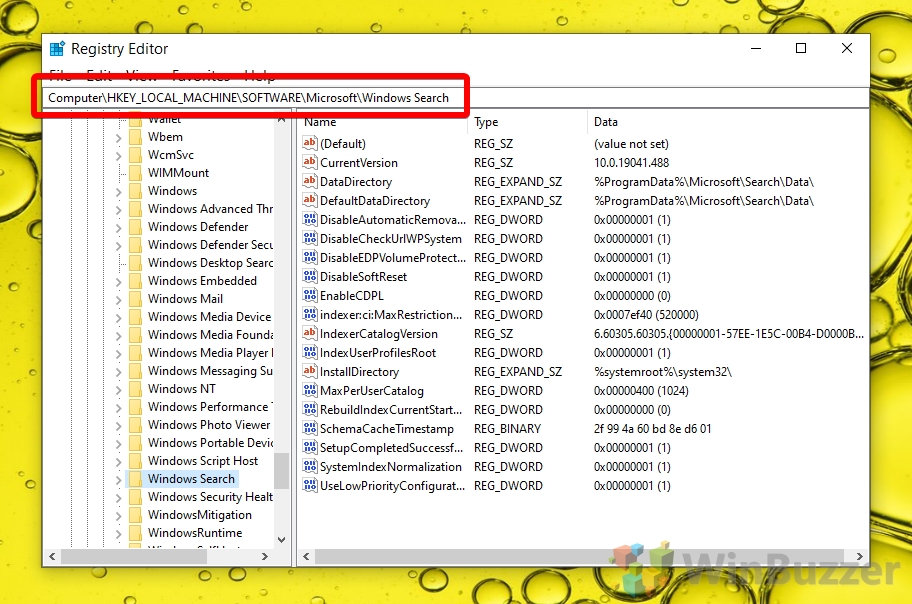
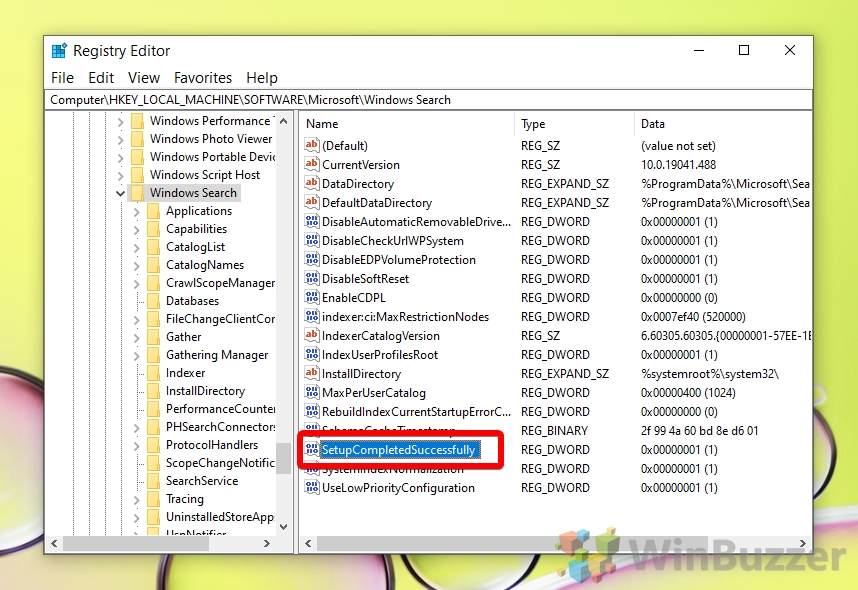
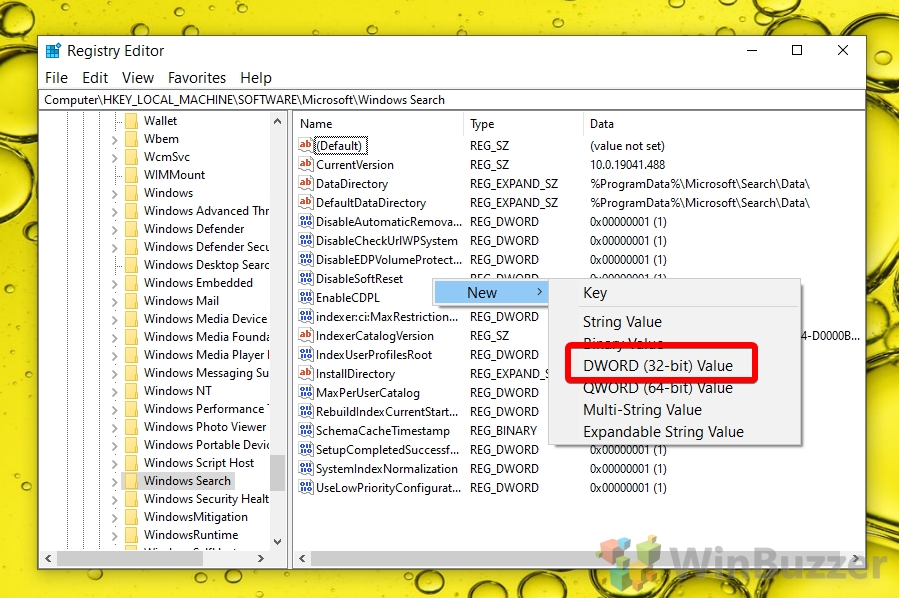
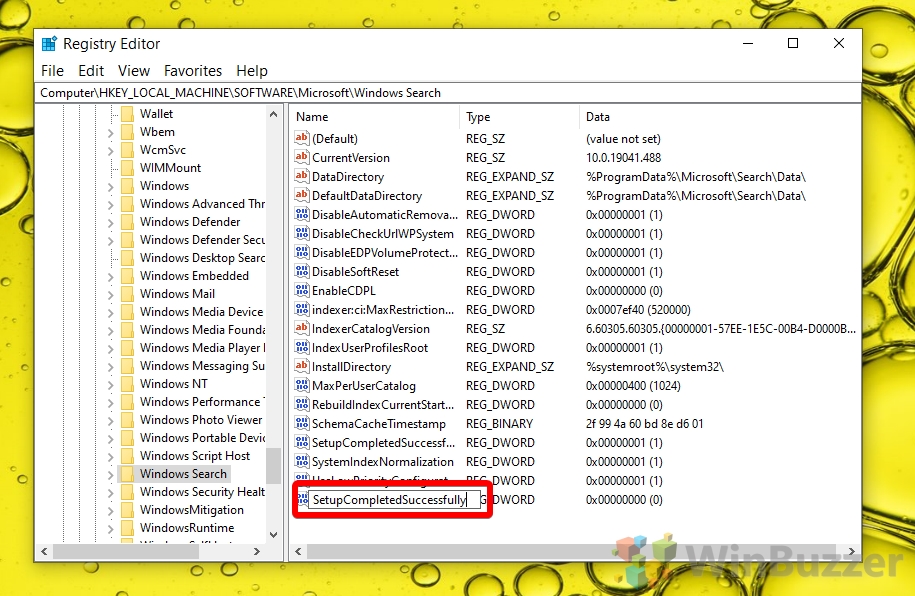
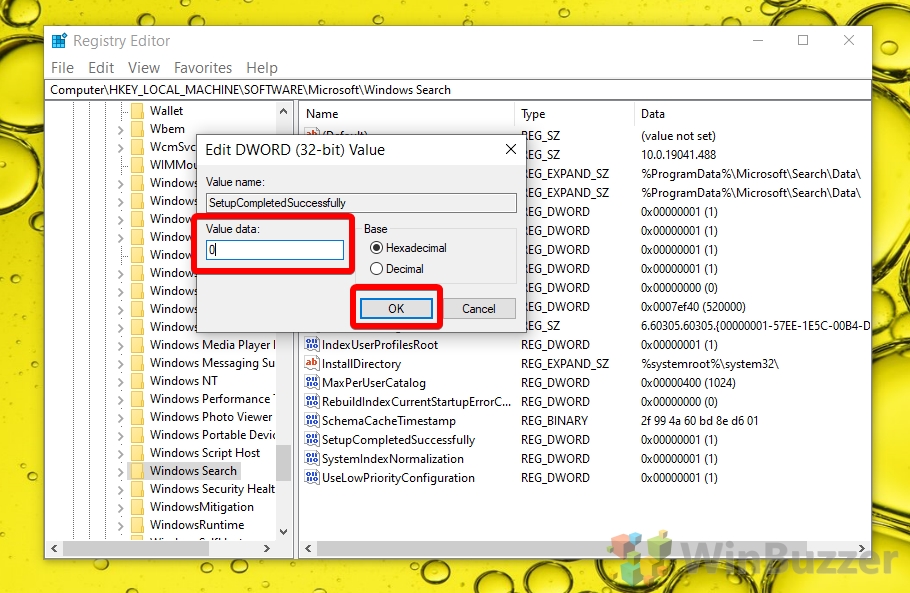
How to Reset and Rebuild the Windows 10 Search Index using Regedit
How to Fix Windows 10 Search or Repair Windows 10 with DISM and Advanced Startup Options
If you still face promblems with Windows search, check out our specific tutorial how to fix Windows 10 search. You may also want to try repairing your system image with DISM or reset/repair your PC via Advanced Startup Options.
![]()
